Build a shelter you can return to
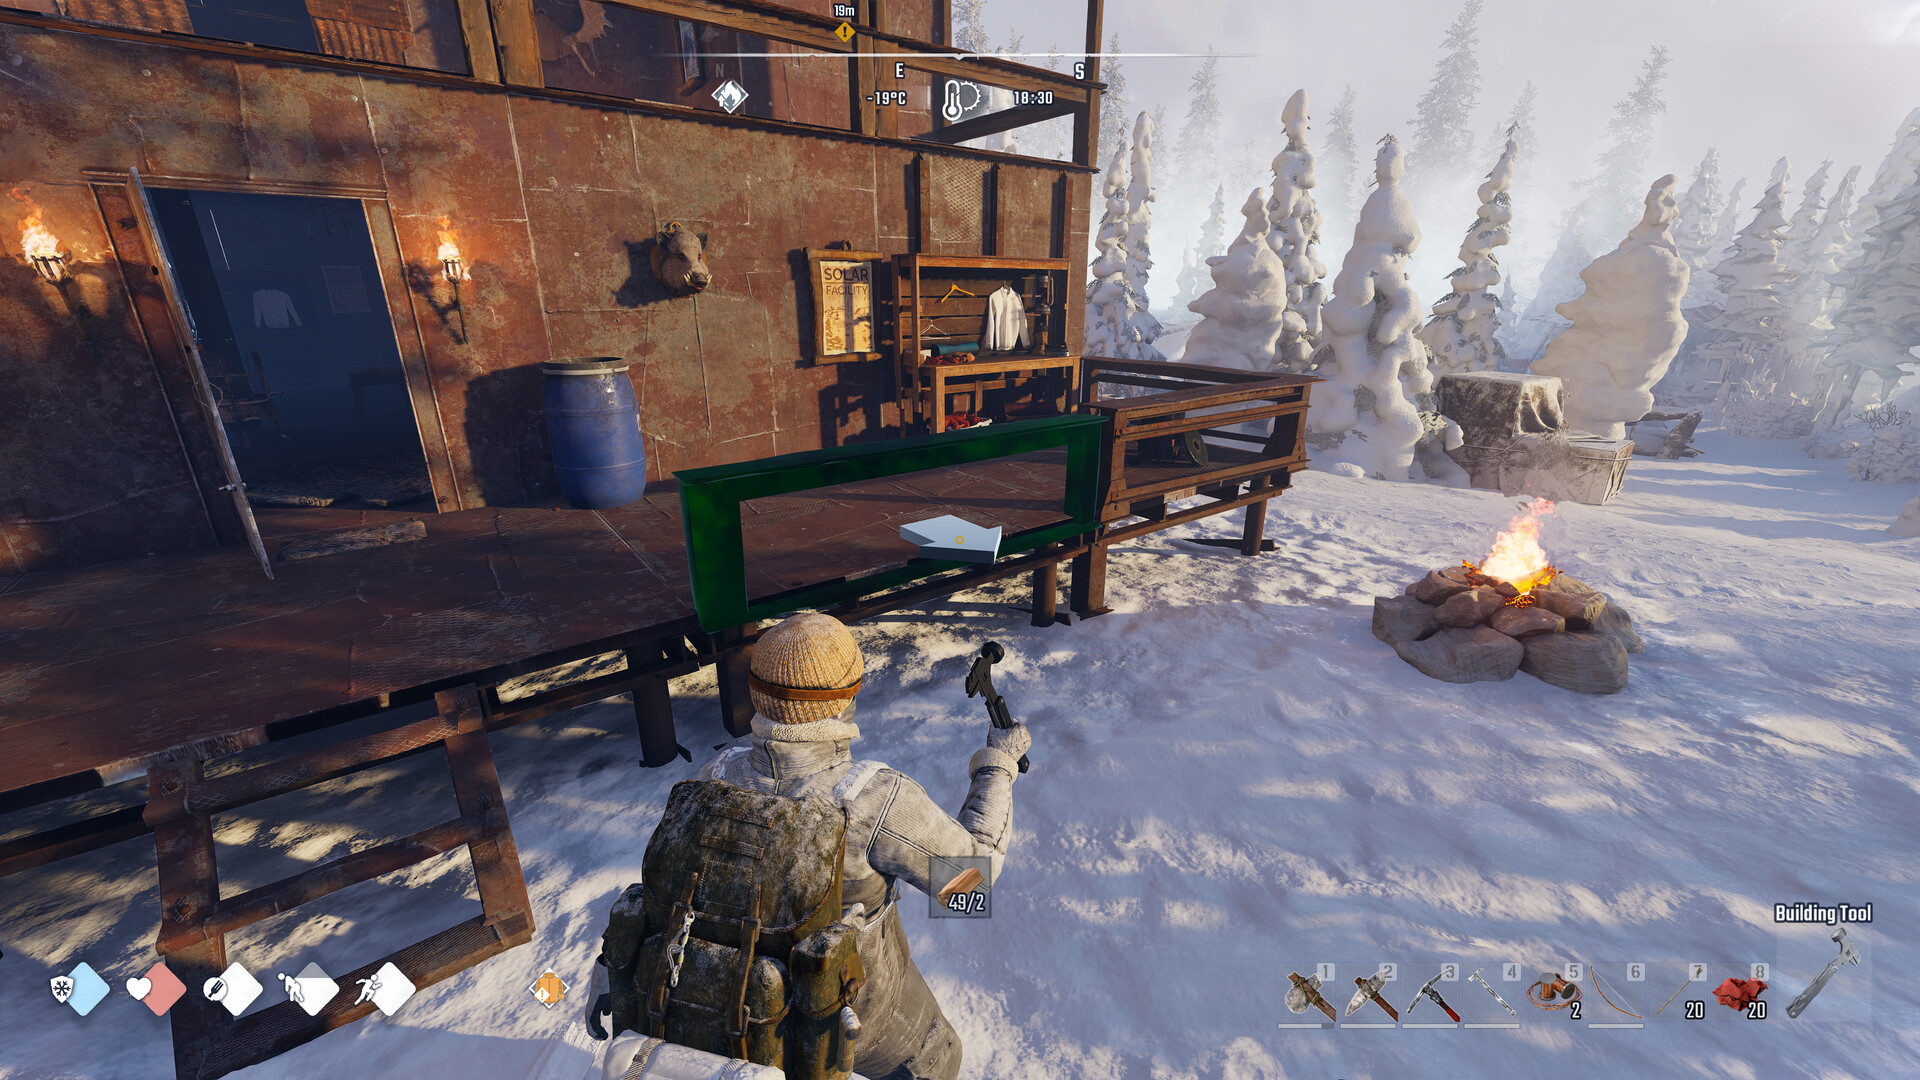
Build outside designated No-Build Zones, place structures when their previews are green, and develop your shelter with heat, a Bed, storage and crafting stations. Use the Building Tool for ordinary construction and for quest renovation, where marked blue outlines identify the pieces to repair.
Check the site before committing materials
Test your proposed site with the Building Tool before bringing over supplies. Ordinary construction is restricted in Horizon and the Hunter's Glade tower, while the Church is also a No Build Zone. Some Cold Zones display a building restriction too, so check the warning where you actually intend to build.
Choose a place that makes your regular gathering trips easy to repeat, and leave room to reach your stations comfortably. Prioritize a practical shelter over a large footprint that delays your essential facilities. If you use the Church as a stop along the way, its existing Dismantle Bench and claimable beds are available even though you cannot place your own stations inside.
Which shelter facilities should you set up first?
Start with foundations, walls, a doorway, a door and a roof, then add heat, a Bed and storage. Expand into crafting as your next objective requires it. New Home introduces much of this progression, including the Radio Station Bench used for later story objectives.
| Option | Purpose and setup |
|---|---|
| Shelter structure | Begin with foundations, walls, a doorway, a door and a roof. Keep the layout manageable while you add the facilities you need. |
| Campfire | Build from Survival in the Building menu for 2 Stone. Supply fuel and light it; cooking uses a lit campfire or stove with wood or coal. |
| Bed | Add a Bed after the shelter structure so your base includes a place to rest alongside its heat and storage. |
| Small Wooden Chest or Wooden Chest | The Small Wooden Chest costs 2 Wood; the Wooden Chest costs 5 Wood. Find the Wooden Chest recipe note on a cooler at Liam's spot during Separated. |
| Workbench | Build from Utilities for 10 Wood. It opens early Flint equipment, including the Flint Pickaxe used to mine Copper and Coal. |
| Stone Furnace | Unlock its blueprint for 2 points in the Building tree and build it from Utilities for 40 Stone. It smelts metal into ingots and converts wood to coal. |
| Repair Bench | Add it to support worn tools as your gathering and crafting routine develops. |
| Radio Station Bench | Set this up as the story objectives require it; New Home introduces it as part of base progression. |
Place and rotate a structure with the Building Tool
- Equip the Building Tool with B, or select it through the Q radial menu. Check for a No-Build Zone warning before choosing the spot.
- Open the construction menu with the right mouse button and choose the structure you want. Start with the shelter pieces before filling the area with stations.
- Position the preview where you want the part and rotate it with R. Leave enough room to approach the doorway and move between your facilities.
- Read any placement message while the preview is red. Address missing resources, support, foundations, obstructions or building restrictions before trying again.
- Place the structure with the left mouse button once its preview is green. Continue developing the shelter, then add the heat, Bed, storage and stations needed for your current objective.
Fix red previews and stubborn ceiling placement
A red preview can indicate insufficient resources, an unsupported structure, an obstruction, a missing foundation or a No-Build Zone. Read the displayed cause before changing your layout. Repeated clicks will not address the condition preventing placement.
- Missing resources: gather what the selected part requires before returning to the same placement attempt.
- Missing foundation or support: address the structural requirement shown by the preview before trying to place the part again.
- Obstructed location: try a clearer position and check the preview again before committing to the revised layout.
- No-Build Zone: move ordinary construction to a permitted area. Handle marked quest renovation through its own objectives.
If a middle ceiling tile refuses placement, try a temporary wall or doorway beneath it as support. Place the ceiling tile, then dismantle the temporary support; the ceiling remains in place. Use this workaround for that ceiling problem after checking the ordinary placement errors.
Install available updates before troubleshooting a stubborn preview. Building part placement and preview visuals have both received improvements. Once updated, retry after correcting the cause displayed by the game.
Repair quest structures in objective order
For quest renovation, use the Building Tool on the marked blue outlines and supply the resources needed to repair those pieces. Follow the active objective instead of renovating everything as soon as you find it. Completing tower repairs before High Frequency starts can prevent the quest from registering that work.
House Camp Flipper sends you to Sean before its wall renovation tasks. In co-op, let the host handle main quest steps and Skinwalker quests. Keep that quest work coordinated while other players help prepare supplies.
Relocate parts without wasting the whole build
To relocate a misplaced player-built part, deconstruct it and rebuild at the new location. Deconstruction returns only part of the materials, so allow for replacing what you lose. Test the destination before dismantling a useful part of your existing shelter.
Expand gradually so changes stay manageable. Check access around a new station before committing to a larger arrangement, and keep the facilities you already use convenient to reach. When your journeys extend farther away, consider developing a network of shelters rather than making every trip depend on the same base.
Turn gathering trips into a useful crafting loop
Use the Workbench to craft a Flint Pickaxe once you have Flint, then gather Copper and Coal for furnace work. A Copper Ingot costs 3 Copper and 5 Coal, and the Workbench turns 1 Copper Ingot into Wire. Collect finished furnace products from the ground beside its base before moving them to the bench.
Plan each outing around the next facility or recipe you need, and leave unnecessary expansion for later. Bring back the missing materials, complete that improvement, then prepare for the next trip. This keeps base development tied to a useful task instead of a growing collection of unfinished plans.